|
Building Raised Garden Beds
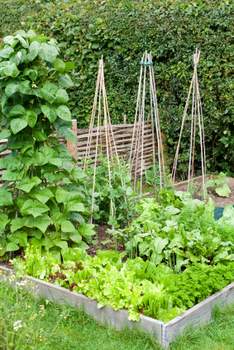
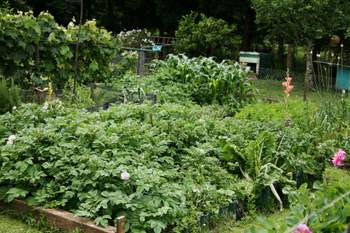
There’s an easy way to start building raised garden beds and make them productive as you build. Growing potatoes in old tyres as you raise your edges around them gets your raised garden bed growing as soon as possible. For an even easier head-start check out these raised bed garden kit reviews. 
Benefits of raised garden bedsA raised garden bed gives you a dedicated, organised and productive vegetable gardening space. Advantages include:
Positioning raised garden bedsYou don’t need a huge space for your raised garden beds, 3-4 square metres is ample. Ideally build your raised garden bed in a position that gets full sun for at least 5-6 hours a day. If your yard is shaded by neighbouring buildings or trees don’t worry, many vegetables and herbs will crop with less, you’ll just have to be more selective. If your bed is rectangular, try to orient it north south so that you can plant tall crops along one side to avoid shading. Building raised garden beds close to your house makes it easier to pick herbs and vegetables while you’re preparing food. 
Make sure you can reach the centre of the bed – part of the advantage of raised garden beds is that you avoid compacting soil by walking on it as you work. If you’re building a number of raised beds make sure you leave a path wide enough to get a wheelbarrow through. Edging materials for raised garden bedsPossible edging materials for building raised garden beds include:
Raise the edges between 10-30cm high. If you want to avoid bending raise them even higher to about 50cm-60cm. Be aware that soil will generally dry out faster on the edges of raised beds. Starting a raised bed vegetable garden with a potato cropThis is great technique for gardeners with little time, because you can get your food crop started straight away and construct your raised garden bed around it. The bounty of your potato crop will inspire you to keep building if you lose momentum halfway.
Get a number of old tyres from the tip or your mate’s yard, an even number is ideal for a rectangular bed. Arrange the tyres in a square or rectangular grid in the location of your planned raised bed vegetable garden. 1x2, 2x2, 3x2 and so on, depending on the space you have. Check this page for further instruction on how to grow potatoes. This also gives you the ability to experiment with the position of your bed by moving the tyres around until you’re happy. The idea is that you can use the tyres as planters for your potato crop and build up the bottom layer of soil for your raised garden bed at the same time. Potato crops are ideal for breaking ground, and one of the best crops for improving soil as they require good manuring. Using mulch that breaks down quickly, such as pea straw, will also help raise the soil level of your raised garden bed. As your potatoes are growing, frame the edges of your raised garden bed around the tyres. Lift out the tyres when you harvest the potatoes and spread the soil as the first layer of your raised garden bed. Then you can add a layer of soil to continue building up the level of your raised bed and plant your next crop. Don’t follow potatoes with tomatoes, eggplants or capsicums. Instead choose leeks, onions, garlic, shallots, peas, beans or root crops. If you’re really pushed for time and can’t get a crop in, scatter a green manure crop such as lucerne, buckwheat, soybeans or broad beans to increase the fertility of your soil. You can dig this in later when you’re ready to plant, or cover it up with your next layer of soil or mulch. Using a raised bed garden kitIf you’d really like to get started quickly, consider purchasing a raised bed garden kit. You can still use this in combination with the potato growing method, but will be able to build the edges of your garden bed much more easily. The advantages here are that materials and instructions are provided, and construction is more straight-forward. Of course this will cost more than salvaging edging materials from the tip. Building raised garden beds for growing vegetables is worth the effort - you'll be rewarded with fresh, healthy food for years to come. Articles Related to Building Raised Garden Beds:
Back to Home Vegetable Gardens from Building Raised Garden Beds
Back to Healthy Eating Guide home from Building Raised Garden Beds
|
Are you as healthy as you can be?
Take action to lift your energy and vitality levels beyond recognition.
Focus on
building healthy eating habits for just one month with
Veg Up and you’ll enjoy the effects for years. You will amaze yourself when you see how much more you can achieve.
More Growing Raw
Newsletter
Be sure to subscribe to "More Growing Raw" newsletter to receive monthly healthy eating tips, Growing Raw news and updates.
Most Popular Articles
- Green Smoothie Health
- Raw Food Health Levels
- Growing Vegetables in Containers
- Healthy Eating Plans
- List of Healthy Food to Always Eat Organic
- Growing a Vegetable Garden in a Polytunnel
- All Natural Detox Diet
Does your body need a fresh start?
Brighten up with all natural detox routines that give your body a cleansing push towards healthier patterns.
Learn how to
detoxify your body naturally. Your body is smart enough to clean itself without expensive detox pills and potions.


